
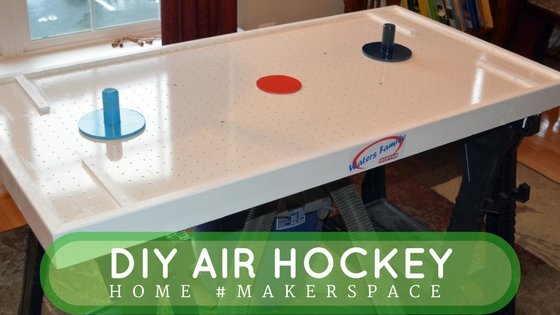
Can You Paint Air Hockey Table Top Surfaces Safely
Yes, you can paint an air hockey table top, but only if you use a high-quality, durable paint that doesn’t block the airflow holes. You’ll need to carefully prepare the surface first to ensure the puck still glides smoothly across the board. If you don’t clear the air holes properly, the game will become unplayable.
When you can paint your table
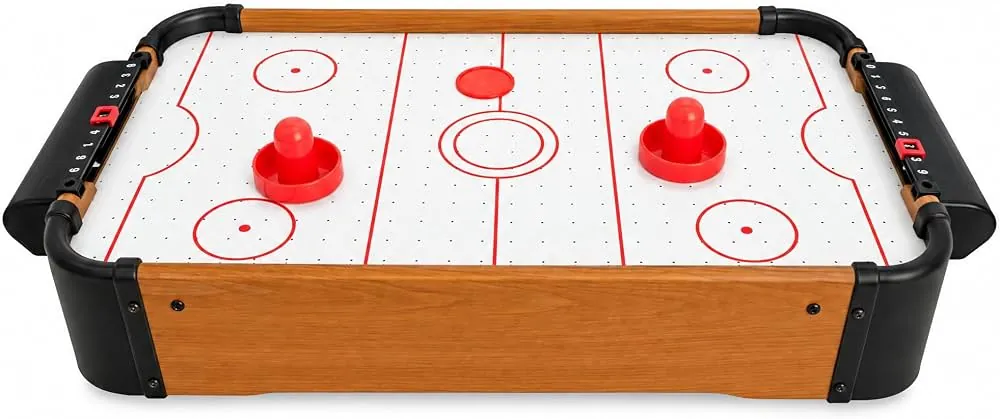
Whether or not you should apply a new coat depends on the material of your playing surface. Most modern tables use a laminate or plastic top, which requires specific preparation to make paint stick.
If your table uses a laminate top, check for deep gouges before starting. If you can catch your fingernail in a scratch, paint will only highlight the defect. In this case, fill the gap with a wood-putty or epoxy filler first, then sand the area flush.
If you’re painting a bare wood surface, you must apply a high-build primer. Raw wood absorbs moisture, which can cause the board to warp and ruin the puck’s glide. Use an oil-based or shellac-based primer to seal the wood and prevent moisture absorption.
Avoid painting if your table has clogged air holes. Even a thin layer of paint will shrink the diameter of these ports, significantly reducing the air pressure needed for the puck to float. If you must proceed, use a toothpick to keep every hole clear while the paint is still wet.
| Your situation | Answer | Why |
|---|---|---|
| Plastic laminate top | Yes | Needs light sanding first |
| Bare wood surface | Yes | Requires a smooth primer base |
| Deeply cracked surface | No | Paint won’t fix unevenness |
| High-speed pro table | No | Surface finish affects puck speed |
| Table with clogged holes | No | Paint will block airflow further |
| Worn, peeling factory finish | Yes | Sanding removes old loose layers |
The impact of surface friction
The primary factor deciding if your paint job succeeds is the friction coefficient of the final layer. Air hockey relies on a cushion of air to lift the puck, but the puck still makes contact with the surface at high speeds. If the paint is too thick or sticky, the puck will drag and lose momentum instantly.
You must also consider the air holes. These are precision-drilled to ensure even pressure across the entire board. If paint fills these holes, the air distribution becomes uneven, creating “dead spots” where the puck won’t move. You must use a very thin, even layer of paint and clear every single hole immediately after applying each coat.
You can determine the ideal friction level for your board by testing a small, hidden area before painting the main field, as the value depends on the paint type and your sanding technique.
Steps for a smooth finish
If you decide to proceed, follow these steps to maintain the table’s performance.
- Remove the old finish: Use 220-grit sandpaper to lightly scuff the entire surface. This gives the new paint a mechanical grip so it doesn’t flake off during play.
- Clean the surface: Vacuum the board thoroughly to remove all dust, then wipe it down with a tack cloth. Any leftover dust will create bumps that stop the puck.
- Protect the air holes: Insert a toothpick or a small wire into each air hole before you begin. This prevents paint from filling the holes and blocking your airflow.
- Apply a thin primer: Use a high-quality spray primer designed for plastic or laminate. Apply two very light coats rather than one heavy one to keep the layer thin.
- Apply the topcoat: Use a hard-shell enamel or a specialized toy safety standard compliant paint to ensure it doesn’t release harmful chemicals during friction.
- Remove the hole markers: Pull the toothpicks out while the paint is still slightly tacky. If you wait until it’s fully dry, the paint may crack around the edges of the holes.
Avoiding common painting errors
The most common mistake is applying the paint too thickly, which creates a ridge around every air hole. This costs you the game’s speed, as the puck will constantly hit these ridges and bounce off course. You can avoid this by using multiple thin coats instead of one heavy application.
Before you start, check the surface tension of your paint. If the liquid pools inside the holes, you have loaded your brush or roller too heavily. Wipe these spots immediately with a lint-free cloth.
If you’re painting a table with thousands of tiny perforations, use a high-density foam roller. This prevents excess paint from sagging into the vents. Always allow at least 24 hours of drying time before you attempt to play.
When to stop and seek help
If you notice any of the following, don’t attempt to paint the table yourself:
The table surface is warped or bowed, which paint can’t correct. If you place a straightedge across the center and see a gap wider than a nickel, the structural integrity is compromised. Painting will only highlight these dips, creating uneven friction that ruins gameplay.
The air blower motor is failing, as painting won’t fix mechanical airflow issues. If the puck drags or stops mid-table despite a clean surface, the motor lacks the necessary static pressure.
You have a vintage or high-value table, as DIY painting will permanently lower its resale value. Collectors prioritize the original factory finish.
The laminate is bubbling or separating from the base, which requires professional adhesive repair. Applying paint over loose laminate traps moisture, causing the material to peel further.
Frequently asked questions
Can I use regular wall paint?
No, you shouldn’t use wall paint because it’s too soft and will become sticky under the heat and friction of the puck. You need a hard, durable enamel or an epoxy-based paint that can withstand constant sliding contact.
How long does the paint take to dry?
You should wait at least 24 to 48 hours for the paint to fully cure before playing. The exact time depends on the humidity and temperature in your room; check the back of your paint can for the specific cure time.
Does the color of the paint matter?
Yes, the color matters because a dark surface makes it harder to track a white puck. Most professional tables use white or light-colored surfaces to provide high contrast for the players.
Will painting stop the puck from sliding?
It will only stop the sliding if you use a thick or textured paint. If you use a thin, smooth, and hard-curing paint, the puck will slide just as well as it did on the original surface.
How many coats are enough?
You should apply two very thin coats of paint to get full coverage without adding bulk. Too many coats will create a thick layer that can crack or peel when the puck strikes it repeatedly.
Is it safe to paint near the air holes?
It’s safe if you keep the holes clear while you work. If you accidentally get paint inside a hole, use a toothpick or a pipe cleaner to clear it before the paint dries completely.
Starting your restoration
Begin by cleaning the table surface with a mild degreaser to remove years of built-up oil and dust. Use a microfiber cloth to ensure no lint remains, as trapped debris will ruin the finish.
You’ll know the surface is ready for primer when it looks dull and feels slightly rough to the touch. If the surface still reflects light like a mirror, keep sanding with 220-grit paper until the sheen disappears.
If you see the laminate peeling away from the wood base, stop immediately and contact a furniture restoration expert to avoid further damage. Attempting to paint over loose laminate causes the material to bubble and tear. If the table surface feels tacky after cleaning, apply a thin coat of shellac-based primer to seal the underlying adhesive.
About the Author Eric Glenn
I launched this blog to provide advanced material, guiding you towards a better and more comfortable gaming tools experience. I deliver more than gaming gear guides, and motivate people to play games and keep the fitness forever!

